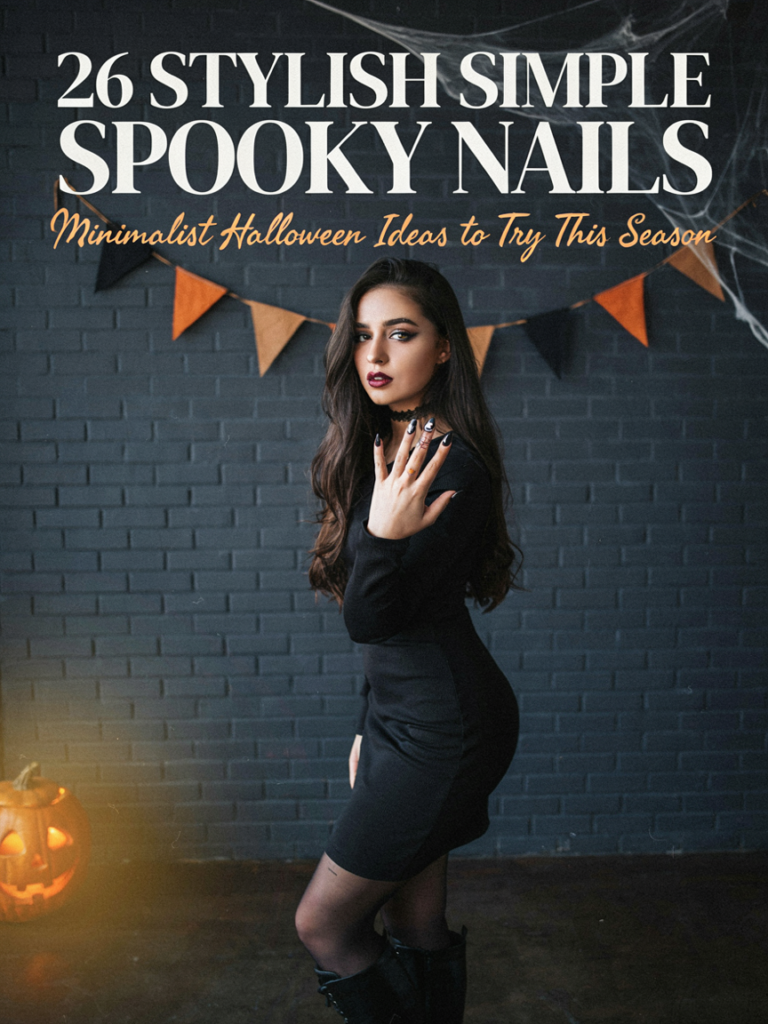
Halloween nail art doesn’t have to be elaborate, time-consuming, or technically challenging to make a powerful statement. Some of the most effective Halloween manicures embrace the power of simplicity — a single spider on a nude base, a tiny ghost peeking above a French tip, or a minimalist pumpkin outline on matte black. Less really can be more when it comes to spooky season nails, and a restrained design often has more lasting elegance than a busy one.
Simple spooky nails are perfect for beginners, for those with limited time before Halloween, or for anyone who prefers a more refined and wearable Halloween aesthetic. They’re also ideal for everyday life and workplaces where dramatic nail art might not be appropriate. In this guide, we’ve curated 26 stylish, simple spooky nail ideas that prove Halloween minimalism is just as impactful as its maximalist counterpart.
1. Single Ghost Accent Nail
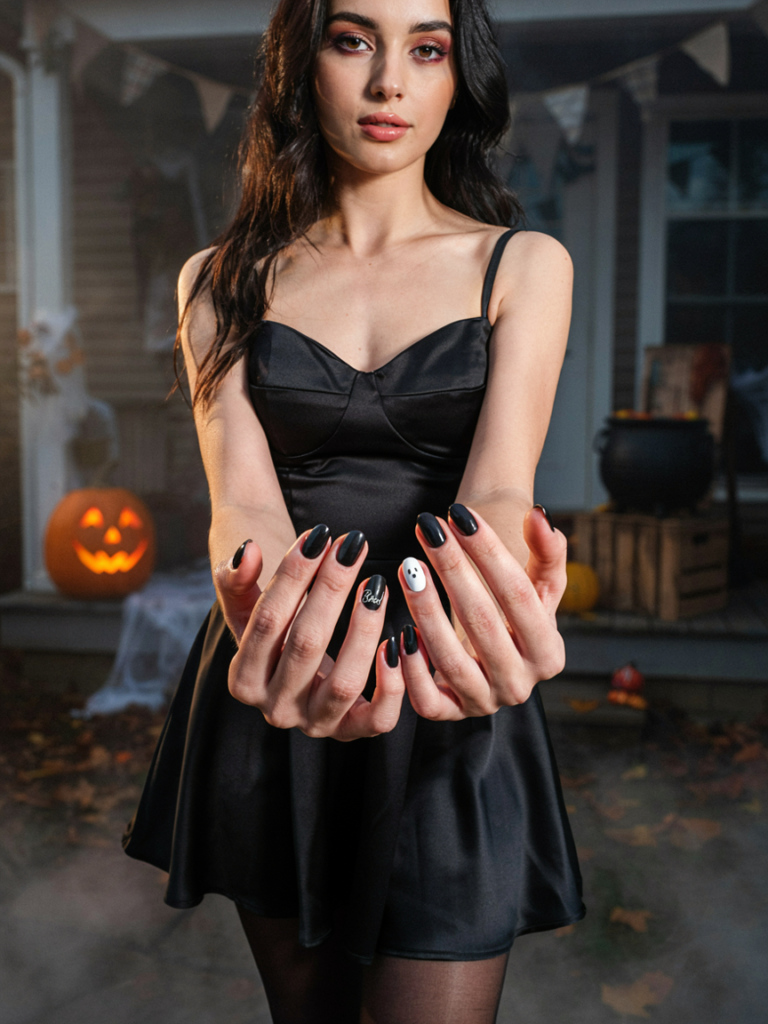
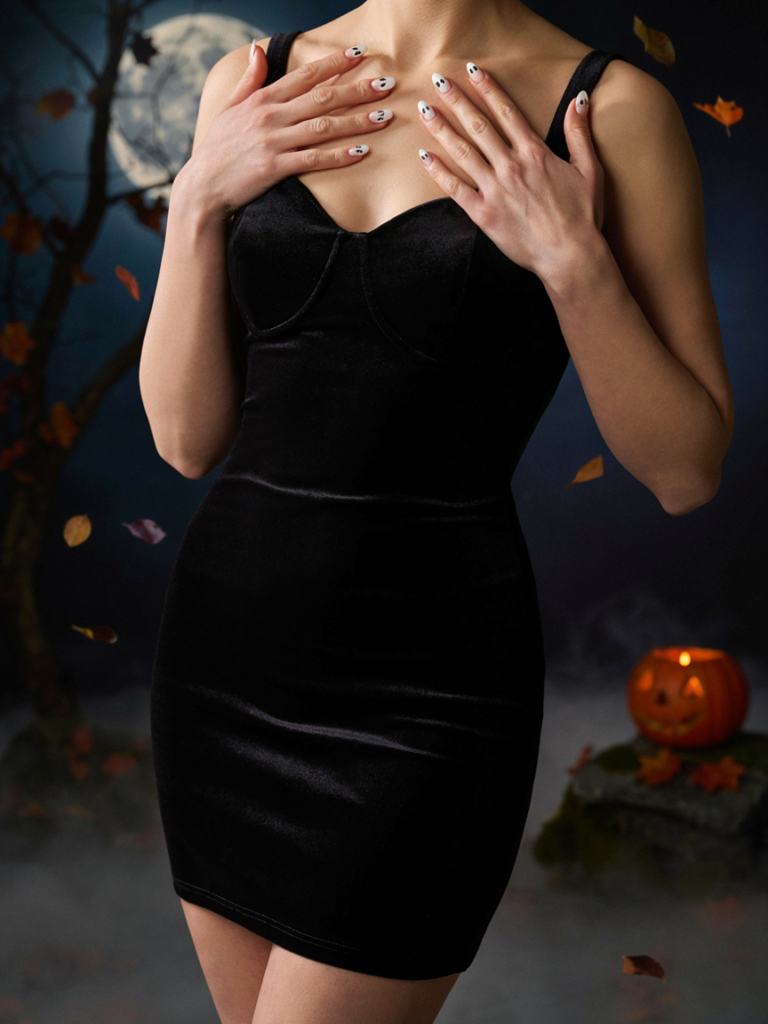
A tiny, perfectly round ghost with simple black dot eyes painted in clean white polish on a solid black or matte nude base is the most charming minimalist Halloween nail design imaginable — instantly recognizable, immediately festive, and completely achievable by even the most inexperienced nail artist. The ghost’s simple round body with its slightly wavy bottom hem and two small circular eyes is a design that requires almost no artistic skill but delivers enormous seasonal impact.
Position the ghost on just one nail — the ring finger of your dominant hand for maximum visibility — while keeping all other nails in a clean solid color for maximum contrast. The contrast between the simple, almost childlike ghost image and the clean minimalist surrounding nails is what makes this approach so effective and visually sophisticated. A tiny ‘Boo!’ written in small script beside the ghost on the accent nail adds a charming, playful touch for extra personality.
2. Spider Web French Tips
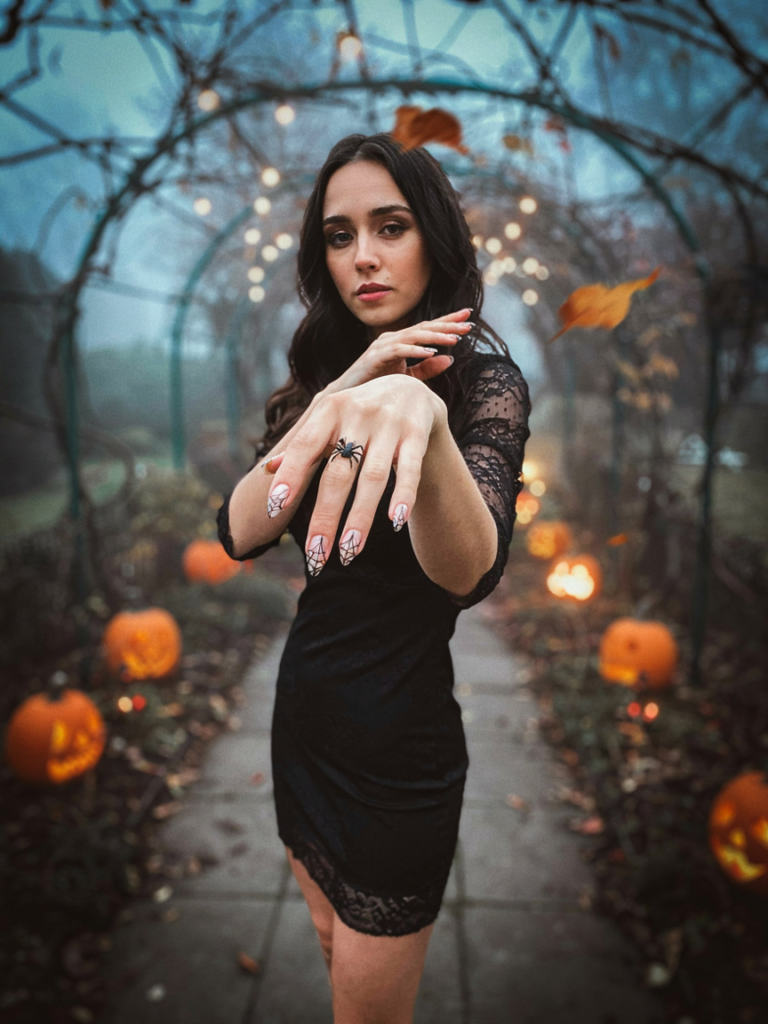
Replace the standard French manicure’s clean white tip with a delicate, precisely drawn spider web design — created with a fine nail art pen or a thin liner brush — for an elegant Halloween twist on one of the most classic manicure styles. The gossamer web radiates from a central point at the corner of the nail tip, with curved cross-lines completing the web pattern in a way that is delicate, decorative, and unmistakably Halloween-appropriate.
The web design looks most elegant when kept light and open rather than dense and heavy — the negative space between the web’s lines is as important as the lines themselves, creating an airy, lace-like effect. Keep the base a classic nude or soft pink to maintain the refined French manicure foundation while the web tip adds seasonal personality. A tiny black spider at the center of the web on the accent nail adds narrative completion without overwhelming the design’s minimalist spirit.
3. Matte Black with Gold Stars
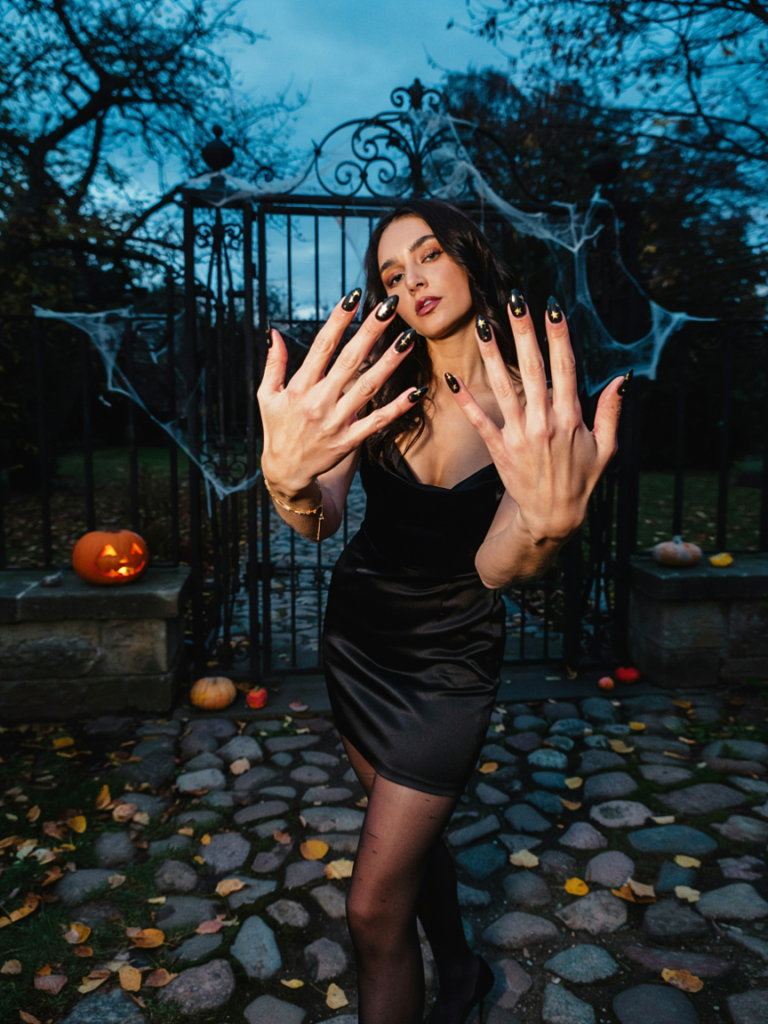
Matte black nails scattered with tiny, precise gold star details create a sophisticated, fashion-forward Halloween look that evokes the witchy and celestial without any overt horror imagery. This design communicates the spirit of Halloween — the mysterious, the nocturnal, the magical — through color and symbol rather than through literal Halloween iconography. It’s elegant enough for any occasion while being undeniably seasonal.
Apply the gold stars using a fine dotting tool in various sizes — larger stars as focal points with smaller scattered stars filling the surrounding space — for a star field that looks naturally random rather than mechanically placed. Gold nail art paint applied with a clean, precise dotting tool creates the sharpest, most defined star shapes. Vary the star density across different nails so some nails feel like dense star clusters while others suggest the empty dark spaces between.
4. Tiny Pumpkin Outlines
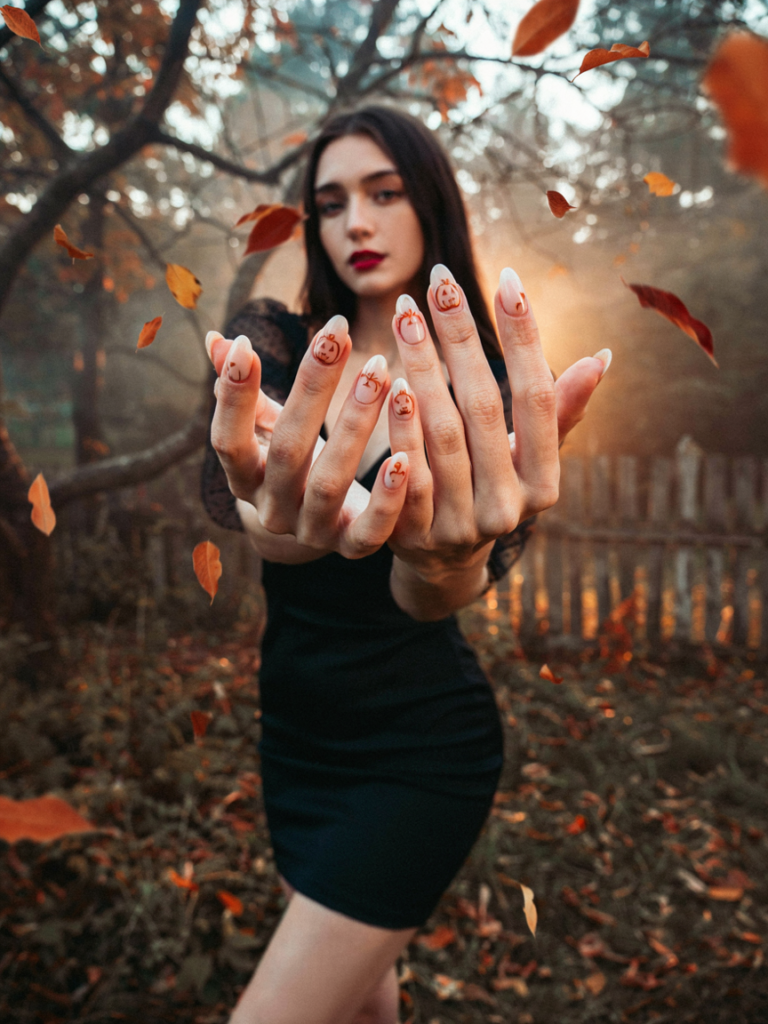
Instead of fully painting solid pumpkin shapes, draw only the minimal outline of a pumpkin — three gentle curved lines for the body segments, a small curved rectangle for the stem — in black or burnt orange nail art pen on a nude or cream base for an artistically restrained Halloween design that’s surprisingly effective. The outline-only approach is modern, graphic, and demonstrates a level of design sophistication that a filled pumpkin often doesn’t achieve.
Add just the triangle eye and nose cutouts to the pumpkin outline on some nails while leaving others as plain pumpkin silhouettes for variety within a cohesive set. The scale of the pumpkins can vary across nails — one large, centered pumpkin on the accent nail and smaller, scattered pumpkins on the surrounding nails creates design hierarchy. This outline approach photographs beautifully against the neutral base and reads clearly at a distance.
5. Negative Space Spider Web
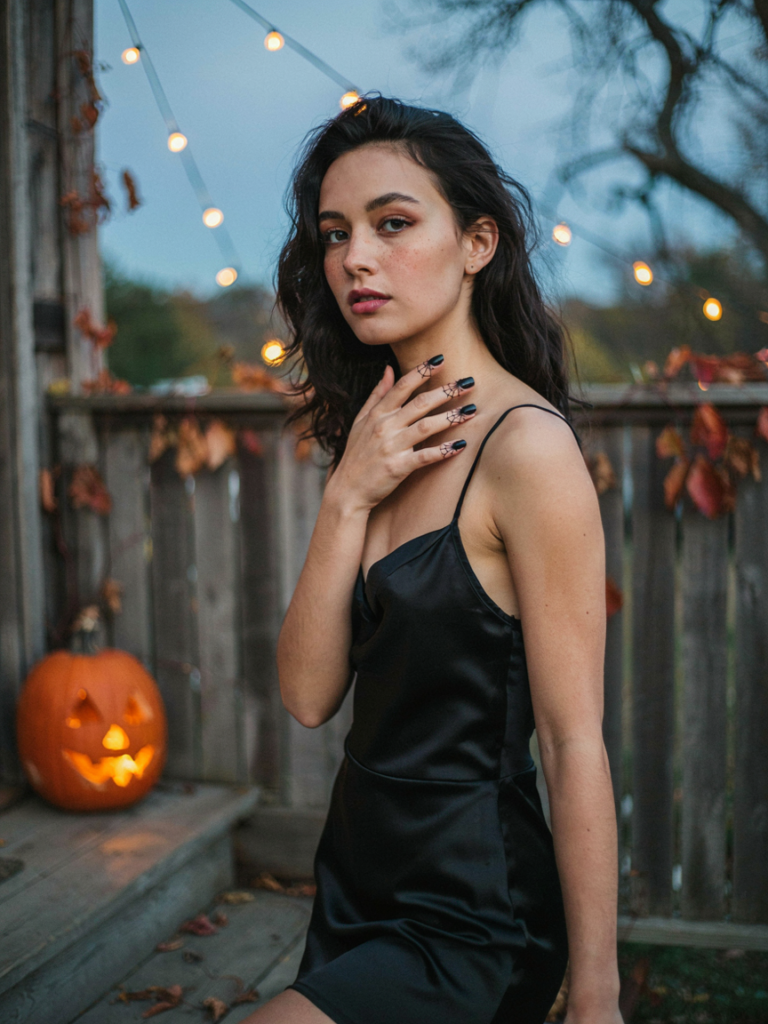
Use nail art tape to block out a geometric spider web shape across the nail, then paint the surrounding areas with black or dark polish, then carefully remove the tape to reveal the negative space web formed by the bare nail or pale base coat beneath. The resulting negative space web looks technical and impressive while actually being created through a clever masking technique that requires almost no artistic skill whatsoever.
The key to clean negative space designs is using high-quality nail art tape that seals tightly to the nail surface without any polish bleeding beneath the edges. Apply the tape with firm pressure along its entire length, then paint confidently over it without hesitation, and remove the tape while the polish is still slightly tacky for the cleanest possible edges. The finished web has a precision and graphic clarity that looks deliberately designed and effortlessly cool.
6. Black Cat Silhouette Nails
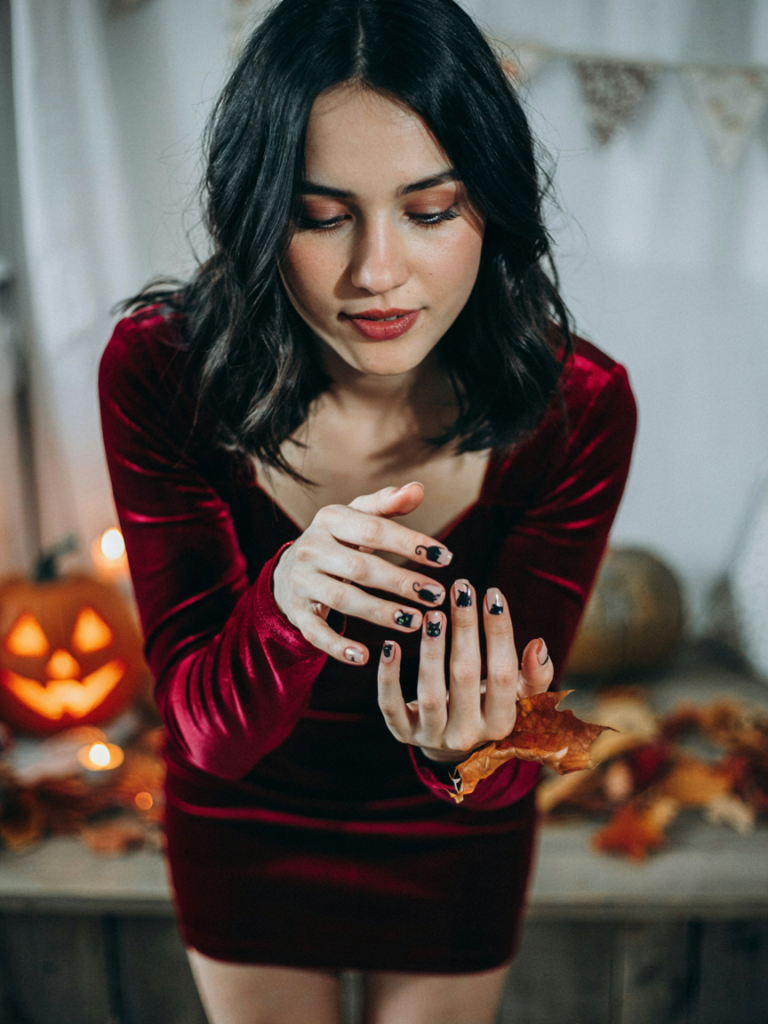
A precisely rendered tiny black cat silhouette — back naturally arched, tail curled upward in greeting, ears alert — painted on a warm grey or pale nude base is both cute and seasonal, universally appealing to cat lovers and Halloween enthusiasts alike. The black cat is one of Halloween’s oldest symbols, associated with witchcraft, mystery, and the crossing of boundaries between the natural and supernatural worlds.
The cat silhouette’s proportions matter for the design’s success — a cat that’s too thin looks like a spider, and one that’s too wide loses the feline elegance. Reference a clear cat silhouette to get the body proportions right before attempting it on the nail. Position the cat at the center of the nail or slightly toward the base for natural-looking placement, and add tiny green dot eyes if the scale allows for the detail — they transform the silhouette into a specific, living individual.
7. Subtle Moon Phase Nails
Paint the eight phases of the moon in a sequence of small, precise circles across multiple nails — from new moon darkness through the crescent, quarter, gibbous, and full moon phases — for a design that is inherently mystical and deeply Halloween-adjacent without depicting anything overtly scary or holiday-specific. The lunar phases are the organizing rhythm of witchcraft, tidal forces, and ancient timekeeping, making them naturally atmospheric for the Halloween season.
Use a small circular stencil or a round makeup sponge to create even, consistent circle shapes, then paint the shadow portions of each phase in black while leaving the lit portions in pale silver or white. The sequence of phases across all ten nails creates a narrative of time passing and light changing that has a meditative, almost cosmic quality. Finish with a high-gloss top coat that makes the pale moon phases glow against dark backgrounds.
8. Ghost French Tips
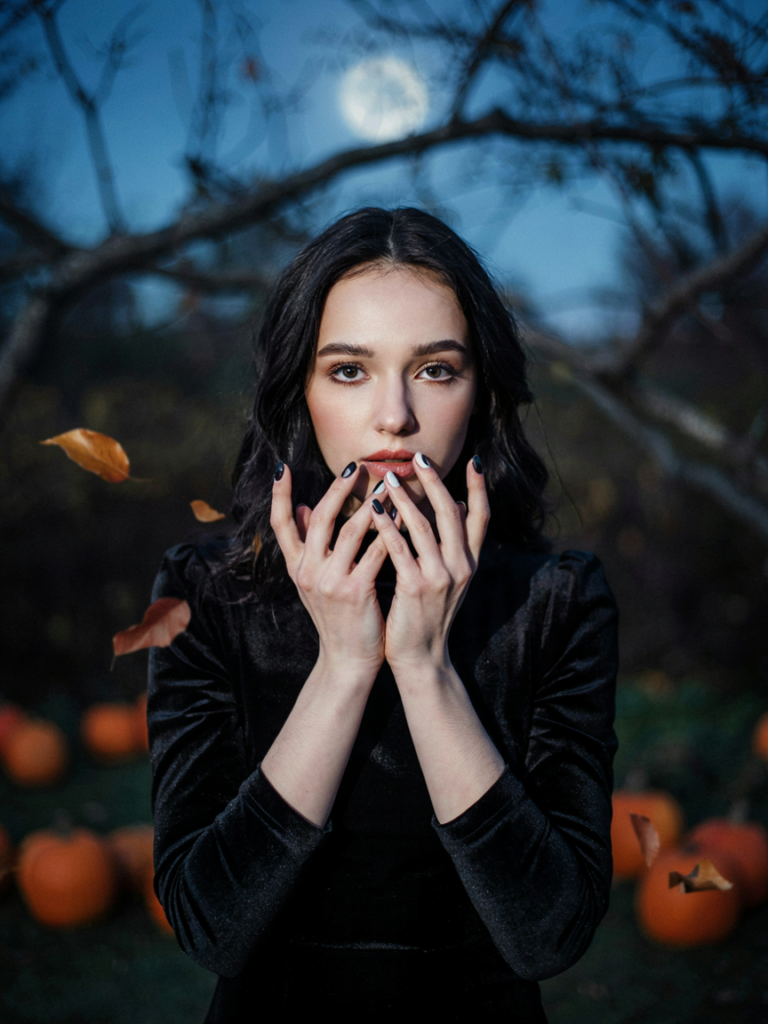
Paint tiny, rounded ghost shapes as the ‘tip’ element of a French manicure — the ghost’s round body replacing the standard straight white tip line, with the ghost’s wavy hem following the natural smile line of the nail — for a Halloween update to a classic manicure that’s clever, adorable, and technically interesting. This design requires only a small white brush and reasonable steadiness of hand to achieve a result that looks professionally creative.
Each ghost tip should be slightly different in the position of its dot eyes — some looking straight ahead, some looking sideways, some looking startled — for a collection of mini ghost personalities across all ten nails that gives the design charm and variety. Keep the base a classic sheer nude or soft pink for the authentic French manicure foundation. These ghost-tipped nails are perhaps the most wearable Halloween nail design in this list — festive but refined enough for any occasion.
9. Minimalist Skull Nails
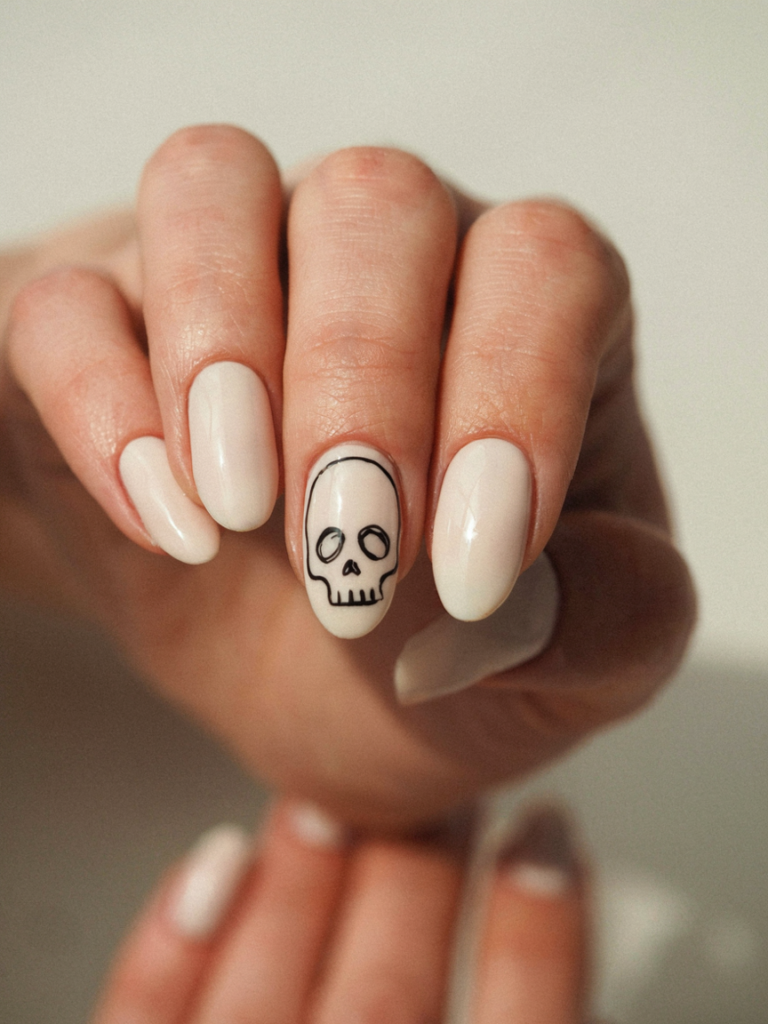
A clean, graphic skull outline — the basic dome of the cranium, circular eye sockets, triangular nasal cavity, and simple row of teeth — drawn in thin black lines on a solid white or cream base creates a Halloween nail design that is strikingly minimalist in the best possible way. The skull is one of the most universal symbols of death and Halloween across cultures, and reducing it to a simple line drawing gives it a contemporary, almost typographic quality.
The proportion of the skull is critical — the cranium should be significantly larger than the face area, with the eye sockets placed in the lower half of the skull as in an anatomically correct skull. Keep the line weight consistent and confident throughout the drawing, and resist the temptation to add too many interior details that would compromise the clean, minimal quality. This skull nail design straddles the line between Halloween and year-round fashion so successfully that many wearers keep it beyond October.
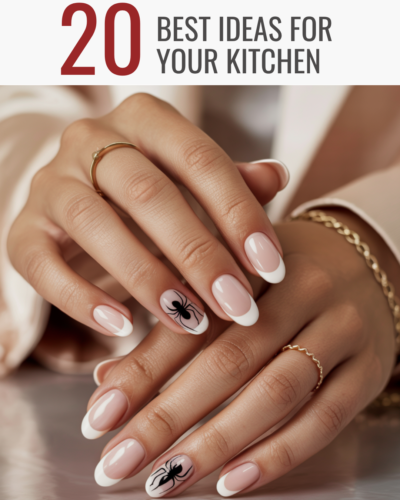
10. Single Spider Accent
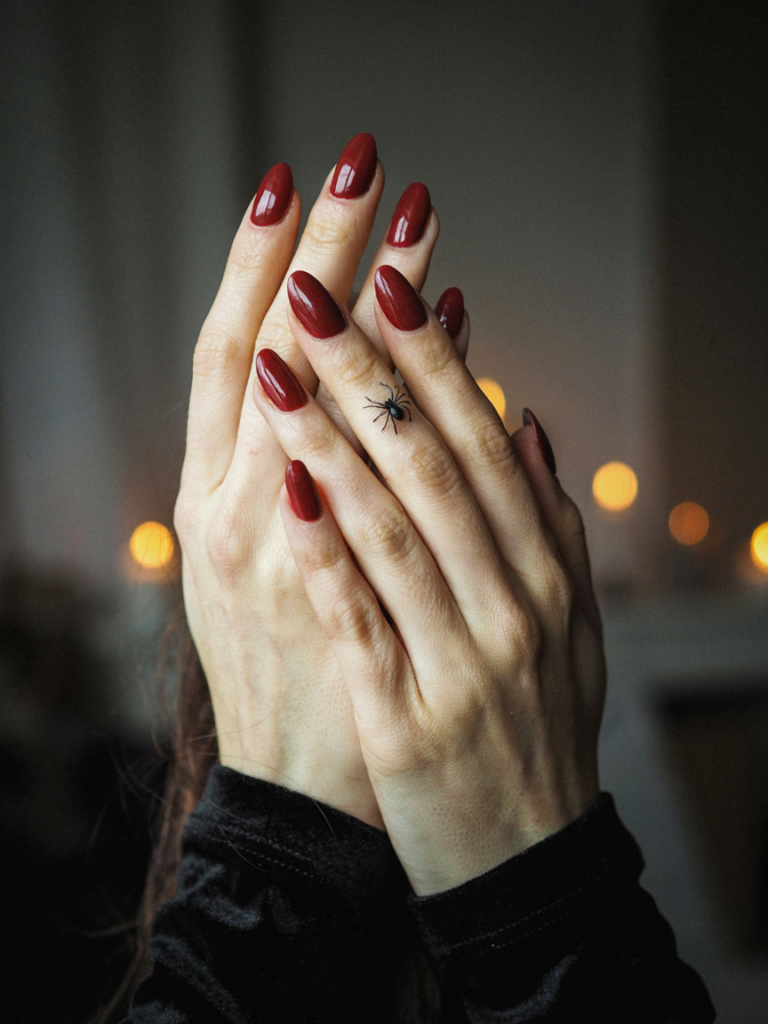
On an otherwise completely plain, solid-color manicure, add one single tiny spider — round body, smaller head, and eight thin thread-like legs — to just one nail on just one hand, creating a design that relies on discovery and surprise as much as on visual impact. The spider is so small and so alone on its nail that a viewer might not notice it at first, and when they do, the delayed recognition creates a more memorable and delightful Halloween moment than an immediately obvious design would.
Position the spider near the edge or corner of its nail rather than the center — spiders prefer corners and margins rather than exposed open spaces, and respecting this creates a more realistic and naturalistic effect. The spider’s legs should be drawn with extremely fine, slightly curved lines that suggest the delicate, mechanical quality of actual spider legs. This design philosophy of hiding a single small horror element in an otherwise clean, beautiful manicure is one of the most sophisticated approaches to Halloween nail art.
11. Drip Tips in Black
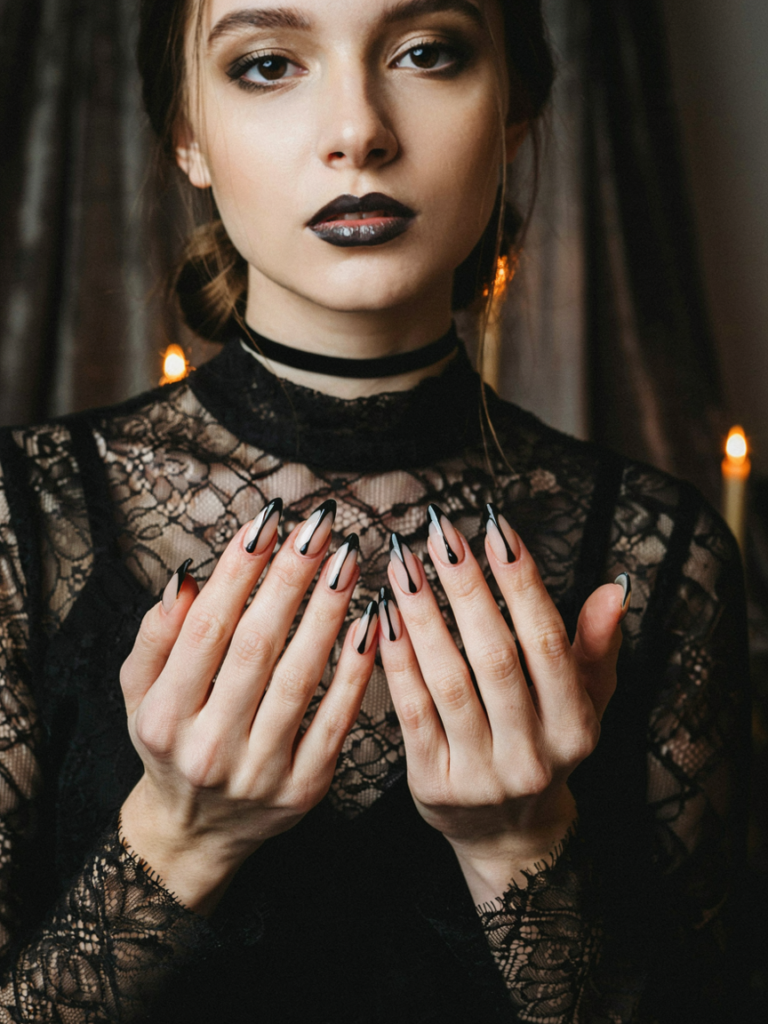
Create an inverted French tip effect by replacing the standard white tip with black polish applied in a deliberate drip pattern along the nail edge — the black color flowing downward in irregular, paint-drip shapes from the tip toward the nail body — for a graphic, darkly elegant Halloween design that suggests something viscous without being explicitly gory. Clean, well-executed drip tips are surprisingly fashionable and appear regularly in editorial nail art beyond the Halloween season.
The drip shapes require a steady hand and a thin brush to achieve clean, distinct drip forms rather than a messy smeared edge. Each drip should vary in length and width — some thin and long, some short and bulbous — for a naturally organic dripping pattern. Paint the drips over a pale nude or white base for maximum contrast, or over a matte grey base for a more architectural, graphic version of the design that feels less Halloween-specific and more universally edgy.
12. Witch Hat Silhouette Nails
A small, pointed witch hat silhouette — the quintessential Halloween symbol rendered in its most economical possible form — on a solid color base communicates the entire Halloween witch aesthetic in a single, simple image that requires almost no technical skill to produce. The hat’s iconic pointed cone shape, slightly curved brim, and optional buckle detail are recognizable from virtually any size, making this design effective even on the smallest nail.
Position the hat centrally on the nail with the brim sitting at roughly the midpoint of the nail’s length, allowing the pointed crown to extend toward the tip for the most natural compositional feel. A single small circular buckle detail drawn on the hatband is the one additional element worth adding — it elevates the silhouette from truly minimal to slightly detailed without compromising the overall restrained aesthetic. Orange, purple, or matte black work equally well as base colors for this design.
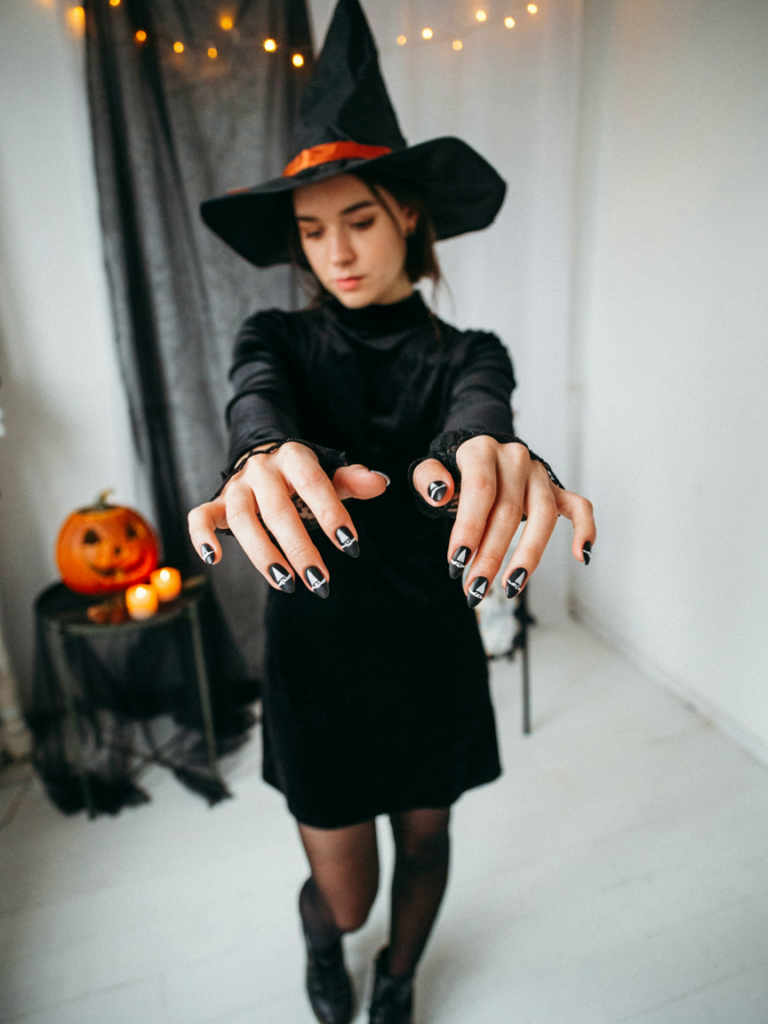
13. Orange and Black Color Block
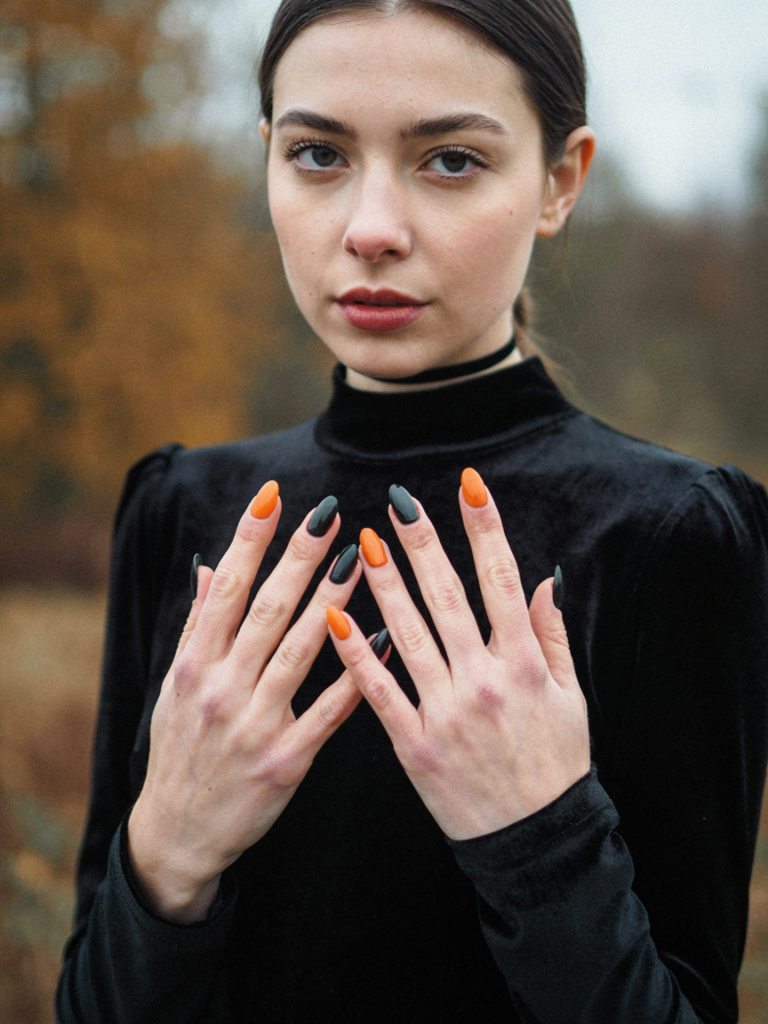
Classic Halloween’s two signature colors — bold, warm orange and deep, flat matte black — arranged in a clean color-block pattern across alternating nails creates a graphic, contemporary minimalist Halloween manicure that communicates the season through color alone, without any illustrative element whatsoever. Color blocking is a legitimate graphic design and fashion approach that proves the most sophisticated Halloween nail art sometimes requires no illustration at all.
The power of this design comes entirely from the quality of execution — the orange needs to be exactly the right shade (leaning slightly toward pumpkin rather than neon), and the black needs to be perfectly even and matte for the contrast to work at full effect. Alternate the colors one-for-one across your nails, or try a pattern of two orange nails followed by one black for a rhythm that keeps the eye moving. Finish with a matte top coat on both colors for a unified surface finish that makes the color blocking look intentional and precise.
14. Bat Stamp Accent Nails
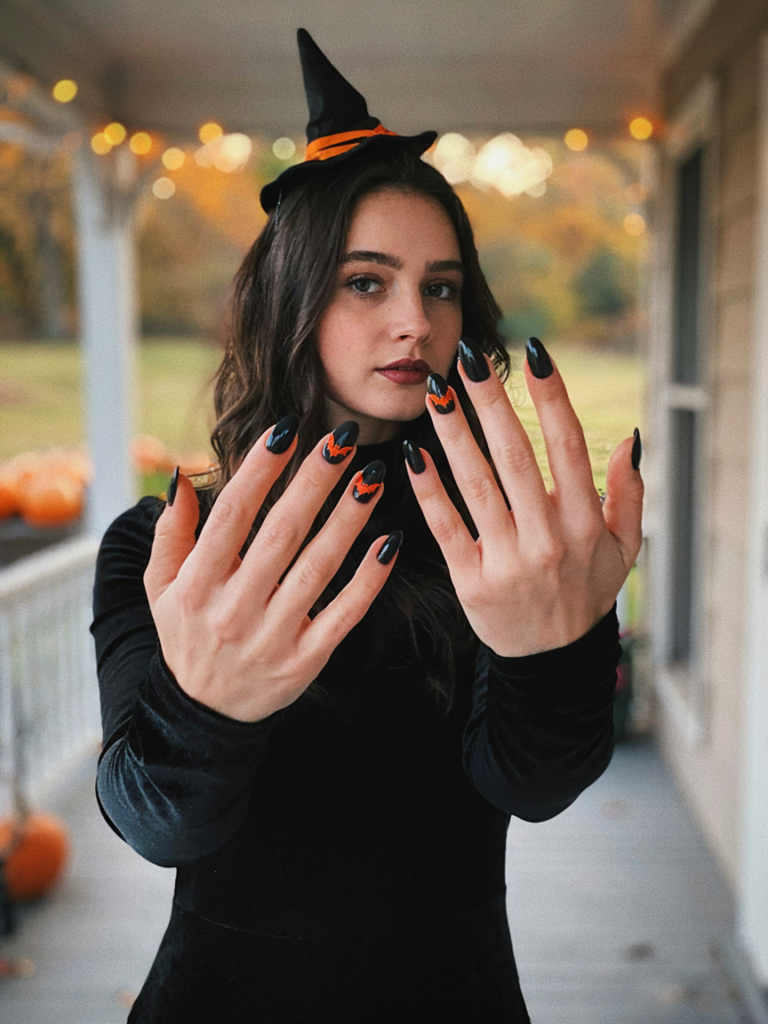
Using a single bat-shaped nail stamp, add one crisp, precisely transferred flying bat to one or two accent nails while keeping all remaining nails in a clean, unadorned solid color — a minimalist approach to Halloween nail art that achieves professional-looking, detailed imagery with essentially no artistic skill required. Stamping plates make this approach genuinely accessible to complete nail art beginners while still producing results that look deliberate and polished.
Position the bat at the center of the accent nail with wings spread horizontally for maximum visual impact, or at the corner with the bat appearing to fly in from outside the frame for a more dynamic composition. Black bat on orange base or orange bat on black base are both striking combinations that maximize the Halloween color palette. Seal the stamp with top coat immediately after transfer to lock the image and prevent smearing during subsequent handling.
15. Nude with Black Dot Details
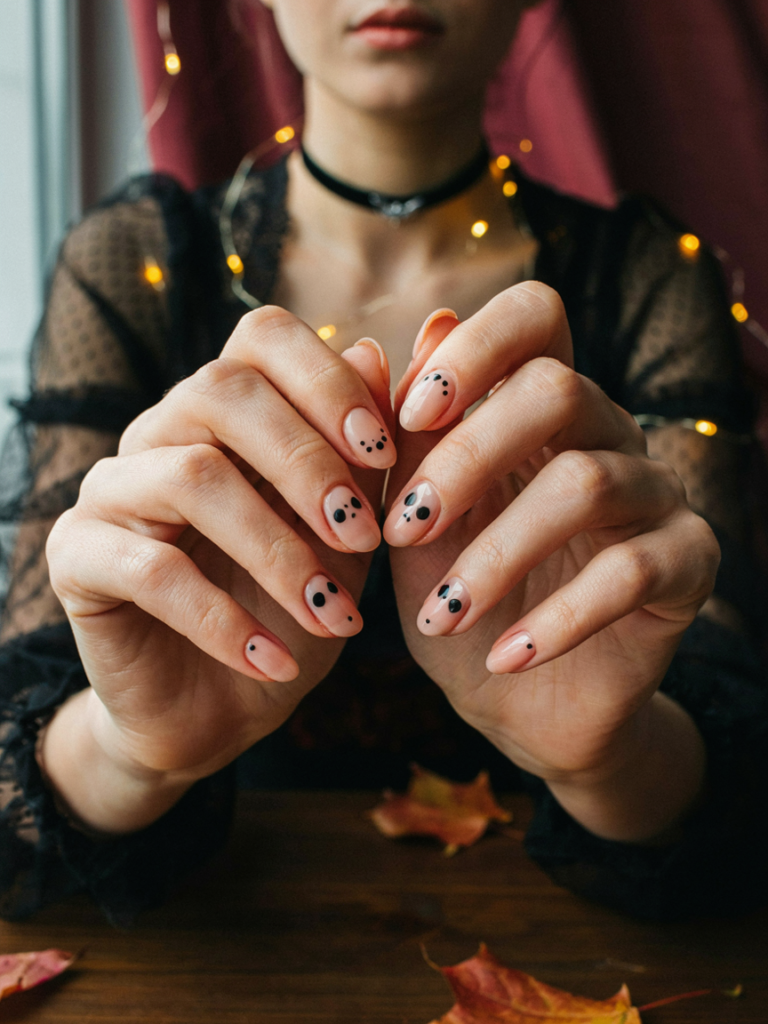
On a clean nude or barely-there base, add subtle black dot patterns that, when examined closely, reveal themselves to form abstract suggestions of Halloween imagery — spider eyes arranged in rows, ghost face dots, or tiny skull-eye arrangements — creating a design that seems simple and neutral from a distance but rewards close inspection with hidden Halloween personality. This approach is perhaps the most wearable Halloween nail design possible.
The dots should be placed with apparent intentionality even if their arrangement seems random — groups of two dots suggest eyes, single dots suggest decorative punctuation, and groups of six or eight dots in the right spacing suggest spider eyes. A dotting tool in two sizes gives you the variety needed to create convincing abstract holiday imagery through the simple language of circles. These nails are genuinely appropriate for any professional or social setting while still marking their wearer as a Halloween participant.
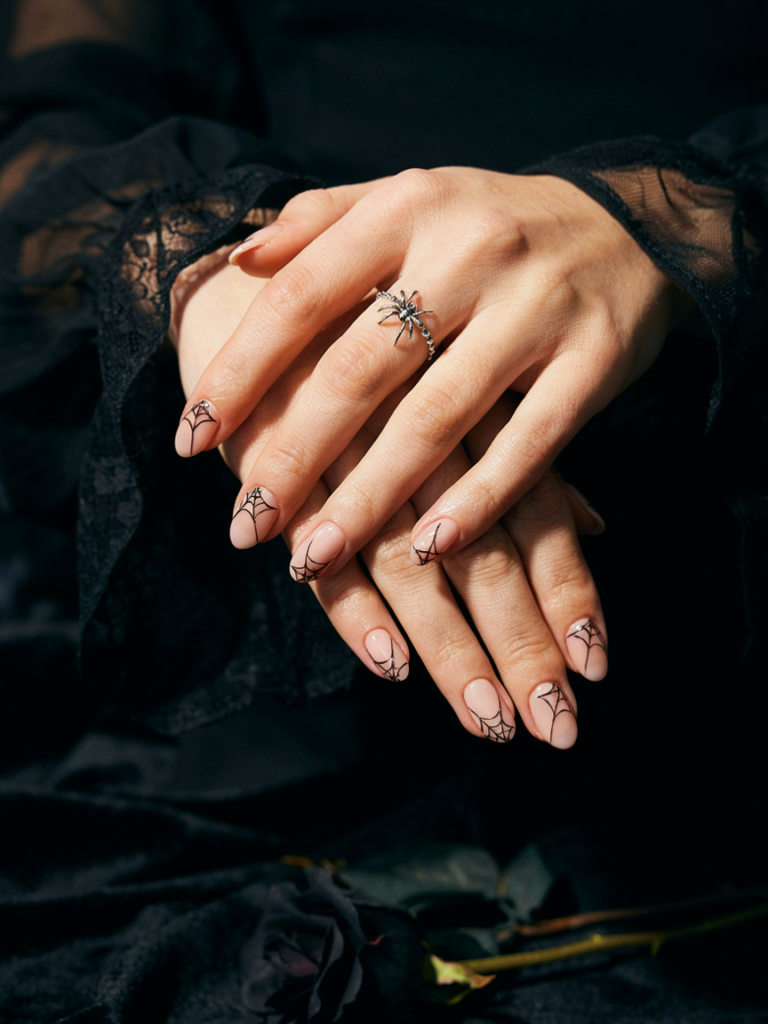
16. Cobweb Corner Nails
Paint a simple, delicate cobweb extending from just one corner of the nail — perhaps four or five radiating lines from a single corner point, with two or three curved cross-lines connecting them to form the web structure — for a Halloween nail detail that is confined, elegant, and surprisingly charming in its simplicity. The corner placement is key: it gives the web a natural home, as though a spider has been quietly building there undisturbed.
The web works most effectively when the lines are thin and precise, with consistent spacing between the radial lines and evenly curved cross-sections. On a nude or pale base, a black corner cobweb creates a refined Halloween detail; on a matte black base, a white or silver corner cobweb creates a more dramatic, gothic effect. Either version is instantly Halloween without the design overwhelming the nail — the web exists in the corner, quietly, as webs are supposed to.
17. Thin Lightning Bolt Nails
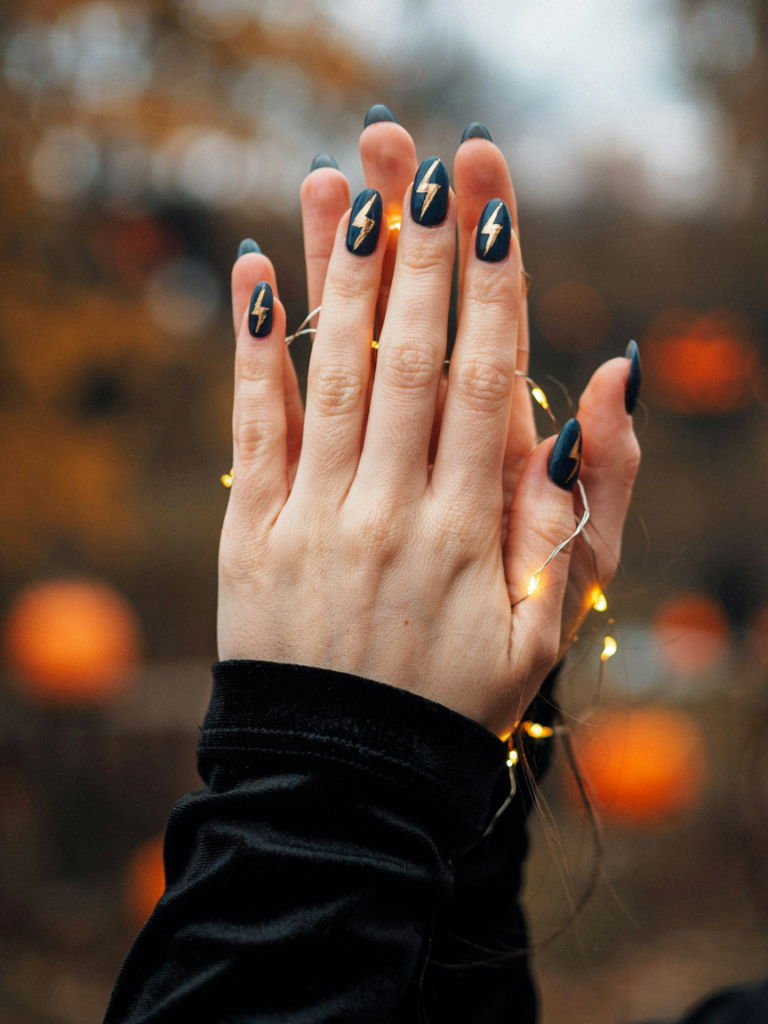
Sharp, precisely drawn lightning bolt details in gold metallic nail art paint on a deep navy or charcoal base create a minimalist, high-energy Halloween design that references magical and supernatural power without any specific horror imagery. Lightning bolts are simultaneously symbols of weather, electricity, divine power, and magic — all themes that resonate deeply with Halloween’s celebration of the supernatural and the elemental.
Paint each bolt as a single confident, angled stroke that changes direction once at a sharp angle for the characteristic lightning zigzag. The sharpness of the direction change is what gives the bolt its crackling energy — gradual curves soften it into something that looks more like a river than lightning. Position one central bold bolt on the accent nail and smaller bolts on surrounding nails for a design hierarchy that scales the imagery effectively across the set.
18. Monochrome Purple Nails
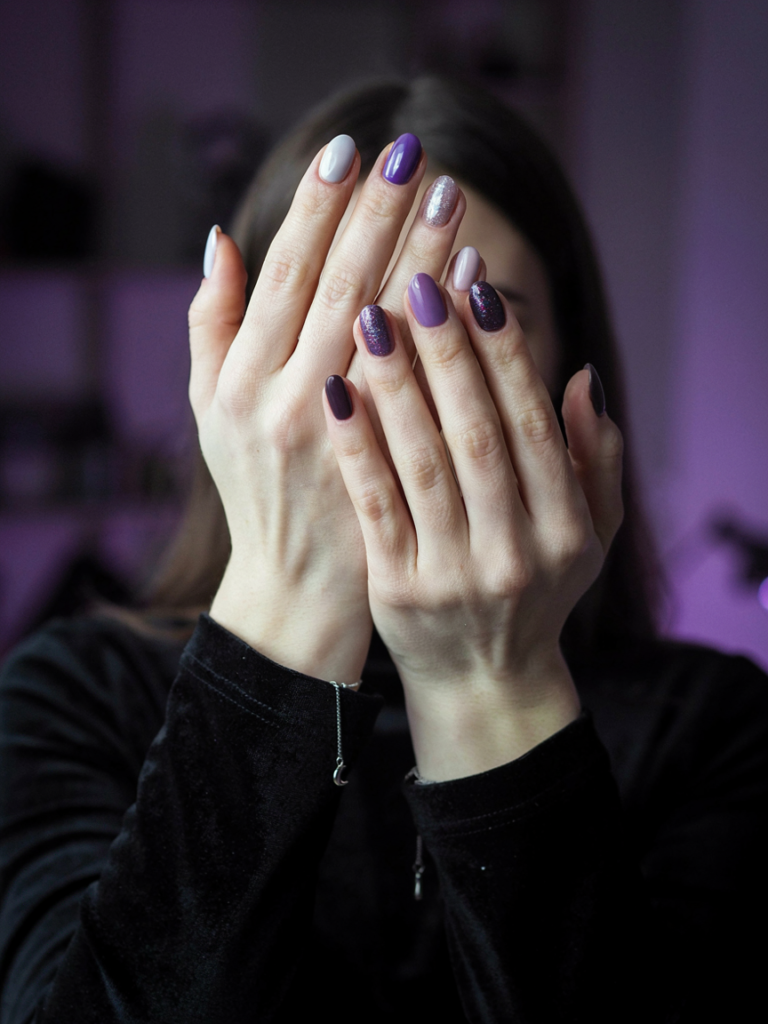
A monochromatic nail set exploring the entire family of purple — from pale lavender through dusty mauve, medium violet, deep plum, and near-black eggplant — across different nails demonstrates sophisticated color understanding while achieving Halloween witch energy through the careful deployment of a single color family. Purple has been associated with magic, mystery, and supernatural power across cultures for centuries, making it the most natural single-color choice for a Halloween manicure.
Add textural variety to the monochromatic approach by mixing finishes across the set — matte on some nails, satin on others, high gloss on the accent nail, and fine shimmer on one or two additional nails — so the set has dimensional interest despite using only one color. The different finishes catch and reflect light in different ways, creating movement and variation within the restrained single-color framework. This is perhaps the most elegant Halloween nail design possible without any illustration.
19. Simple Eye Nails
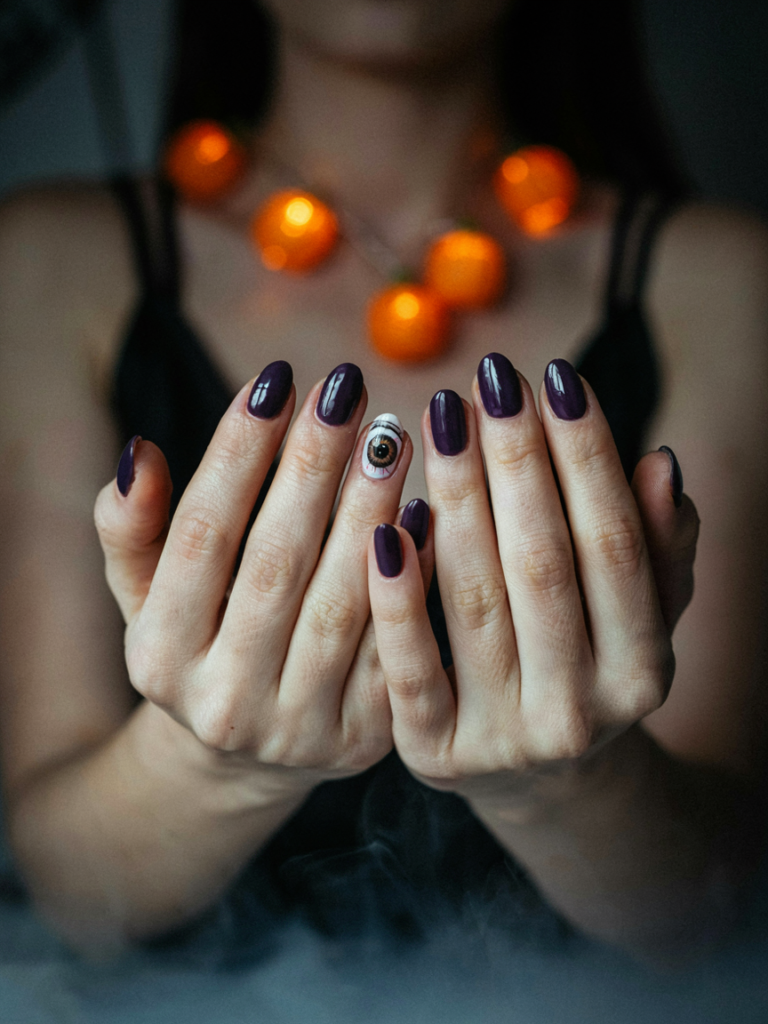
A single, wide, unblinking eye — rendered with a white sclera, a dark iris, and a heavy, slightly swollen lid — drawn on one accent nail is inherently unsettling in a way that transcends specific Halloween iconography. Eyes depicted alone, without a face, tap into primal discomfort with being watched and observed, making this one of the most psychologically effective minimalist Halloween designs despite its simple composition and modest technical demands.
The eye works most powerfully when it appears genuinely realistic rather than cartoon-like — give the iris color depth and the pupil precise placement, add a small white highlight reflection dot, and include subtle red veining in the sclera for convincing anatomical detail. Pair the eye accent nail with clean, solid-color nails in deep purple or black to give it maximum isolation and visual authority. The single eye nail is the kind of design that makes people feel slightly but pleasurably uneasy.
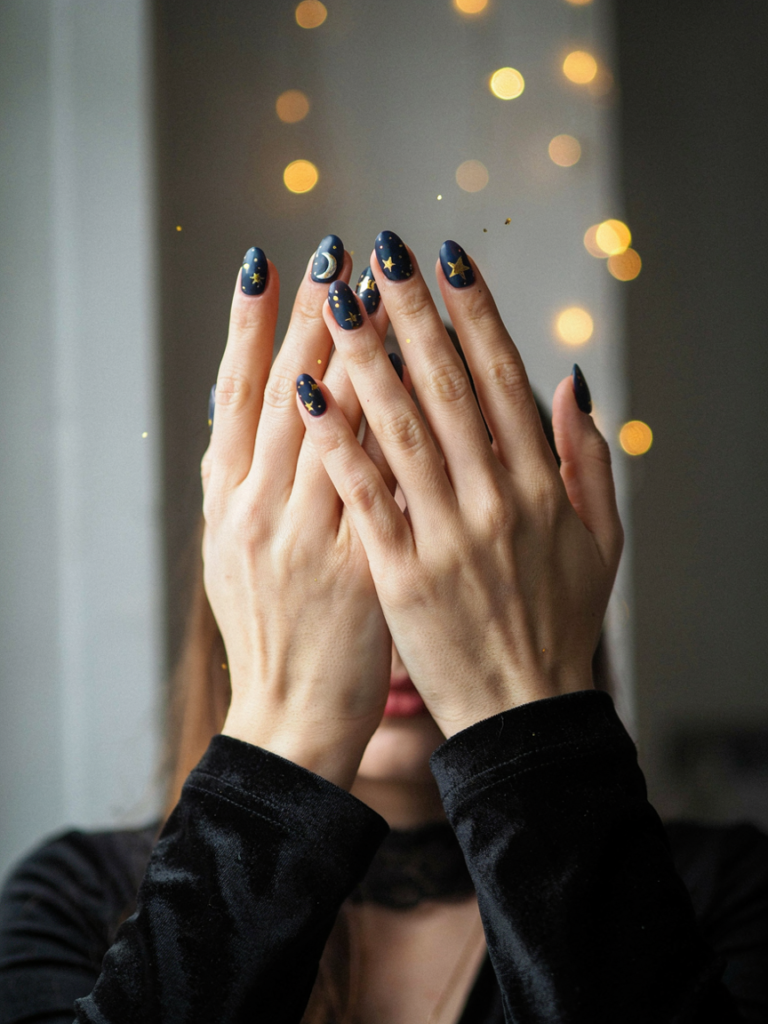
20. Stars and Crescent Moon Nails
Gold or white stars in varied sizes and a delicately proportioned crescent moon scattered across a deep navy, forest green, or matte black base create a celestial, witchy nail aesthetic that is effortless to achieve and universally appealing in its quiet beauty. This is one of the most wearable designs in the Halloween nail art canon — suitable for any October occasion from a workplace to a formal party, communicating the season through universal celestial symbols rather than horror imagery.
Apply the stars with a fine dotting tool in two or three sizes for natural variety — a larger star on the accent nail as the focal point, medium stars as supporting elements, and tiny star dots scattered freely across the remaining nails. The crescent moon should be proportionally generous rather than thin — a visible, substantial crescent that reads clearly across the nail rather than a hairline curve that disappears in practice. These nails photograph beautifully in any lighting condition.
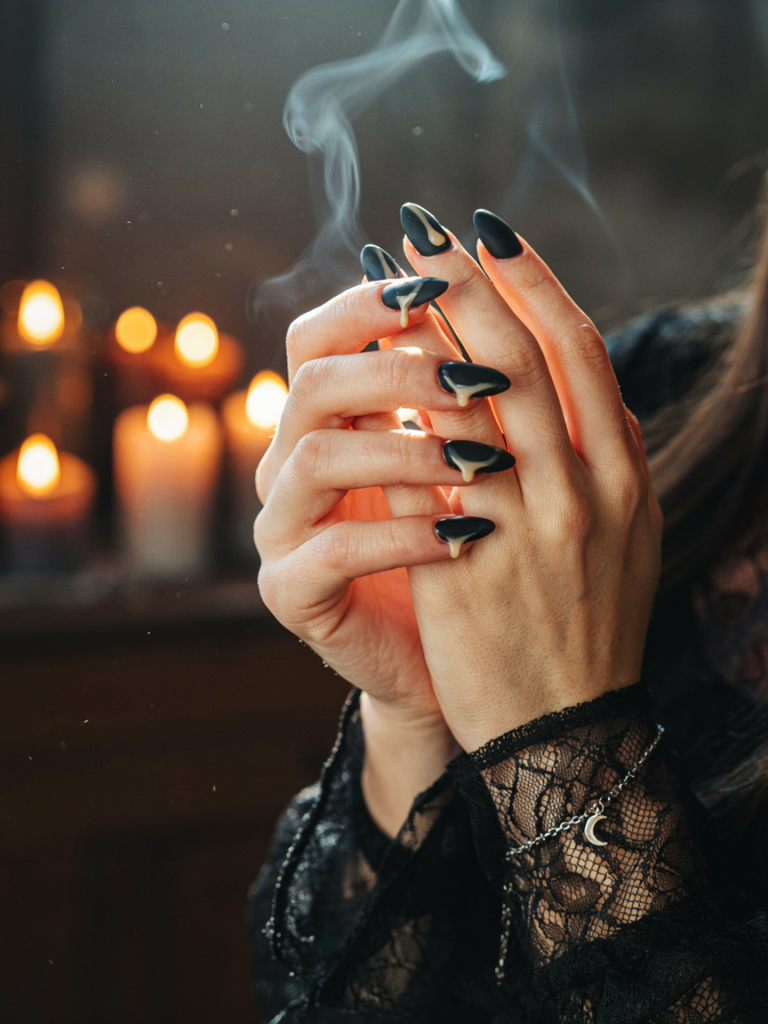
21. Dripping Candle Nails
A thin, carefully painted trail of candle wax dripping down the side of the nail — suggested with off-white or pale cream polish on a dark base, flowing in the characteristic bulging drip shapes of real melted wax — creates an abstract Halloween design that is atmospheric rather than literally spooky. The candle wax reference evokes dimly lit Halloween settings, ritual spaces, and the specific ambiance of flickering candlelight in the dark.
The drip shapes require practice to achieve the right proportions — the wax should appear to accumulate as it flows, getting slightly wider at each drip’s lowest point where it would cool and harden in reality. Run the drips along the side edge of the nail rather than down the center for the most naturalistic placement. Against matte black, these pale wax drips look almost three-dimensional, catching the light in a way that creates convincing texture without any actual dimensionality.
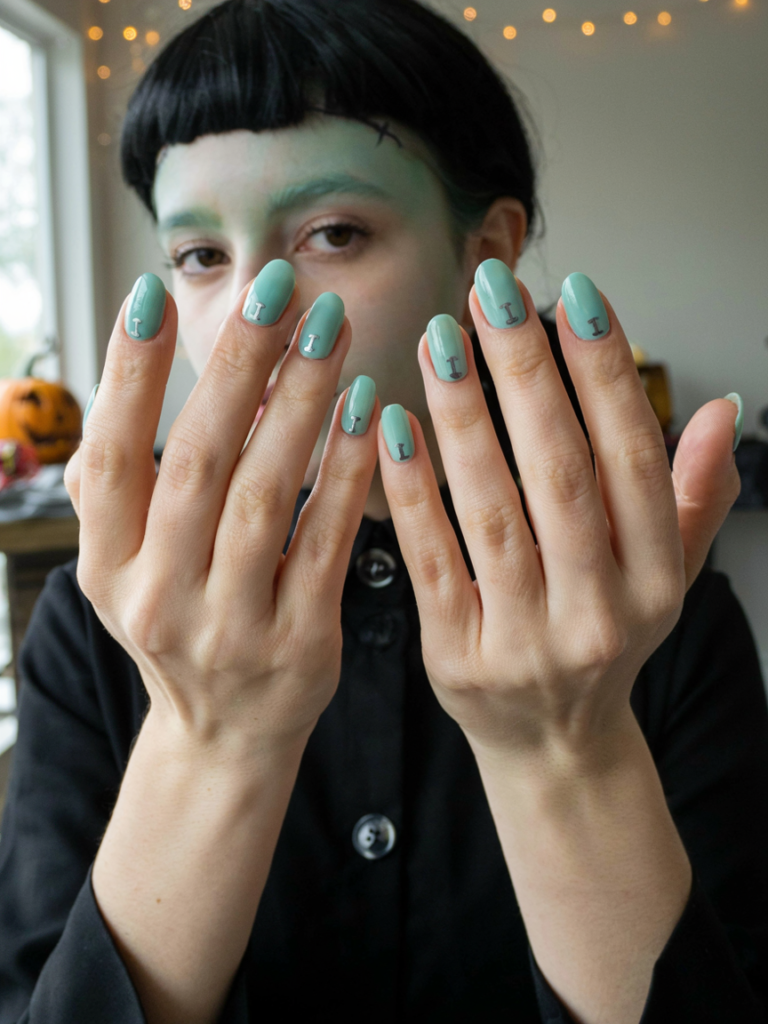
22. Simple Frankenstein Bolts
Two small silver bolt shapes painted on a mint green or nude base nail are all that is needed to reference Frankenstein’s monster in the most minimal, immediately recognizable way — the bolt is perhaps the character’s single most iconic visual attribute, more specific even than the flat-topped head or green skin. This approach distills a complex Halloween character down to his most essential distinguishing detail and communicates the full character through that one element alone.
The bolt shapes should be simple cylinders with a slightly wider flat head — like a very short, thick T-shape — painted in silver with a tiny black line suggesting the thread at the top. Two bolts placed side by side at the base of the nail, as though at the monster’s neck, immediately anchor the green base in Frankenstein iconography without requiring any additional illustration. This design is accessible, clever, and demonstrates the power of synecdoche in Halloween nail art.
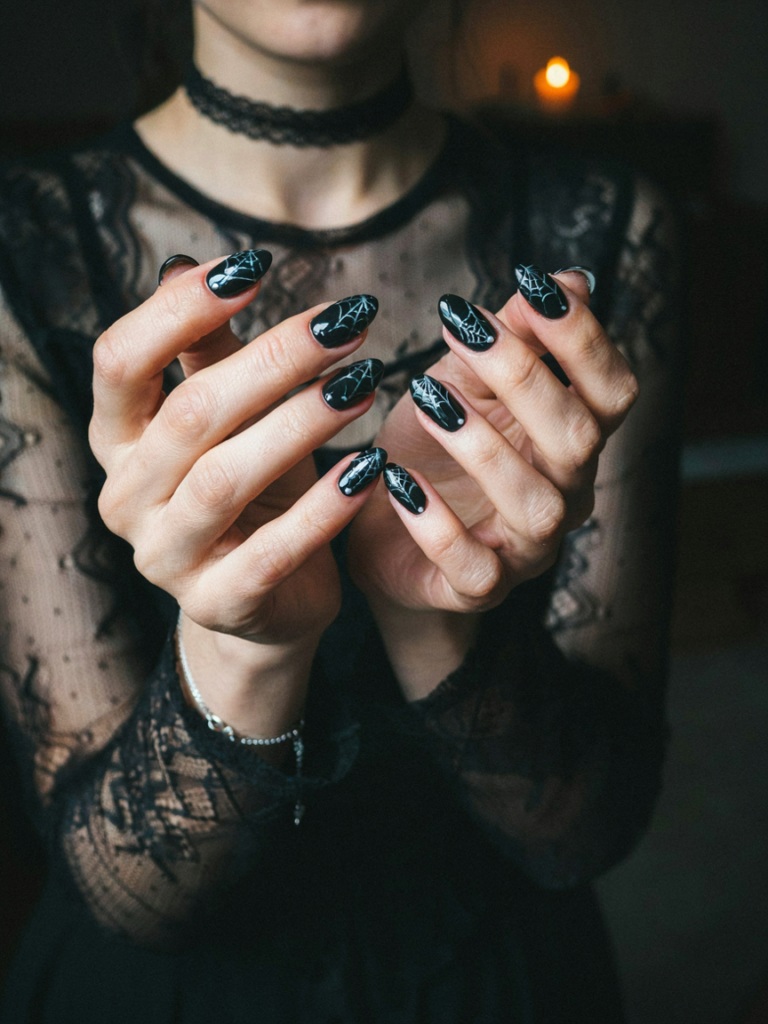
23. Spiderweb Nail Tips
Use the very tip of the nail as the origin point of a spider web design, with web lines radiating outward from a central point at the nail tip and curved cross-lines completing the web pattern within the upper third of the nail body. This tip-origin approach is visually unexpected — webs typically extend from a corner rather than a central point — and creates a design that feels architectural and geometric rather than simply decorative.
The web’s radial lines should extend all the way to the nail edges, with the curved connecting lines following the arc of the nail body for a design that integrates naturally with the nail’s own shape. Only three or four radiating lines are needed for a convincing web — adding more creates crowding that loses the open, airy quality that makes a web design elegant. The tip-centered web works particularly well on short, rounded nail shapes where the geometry of the design complements the nail’s own curvature.
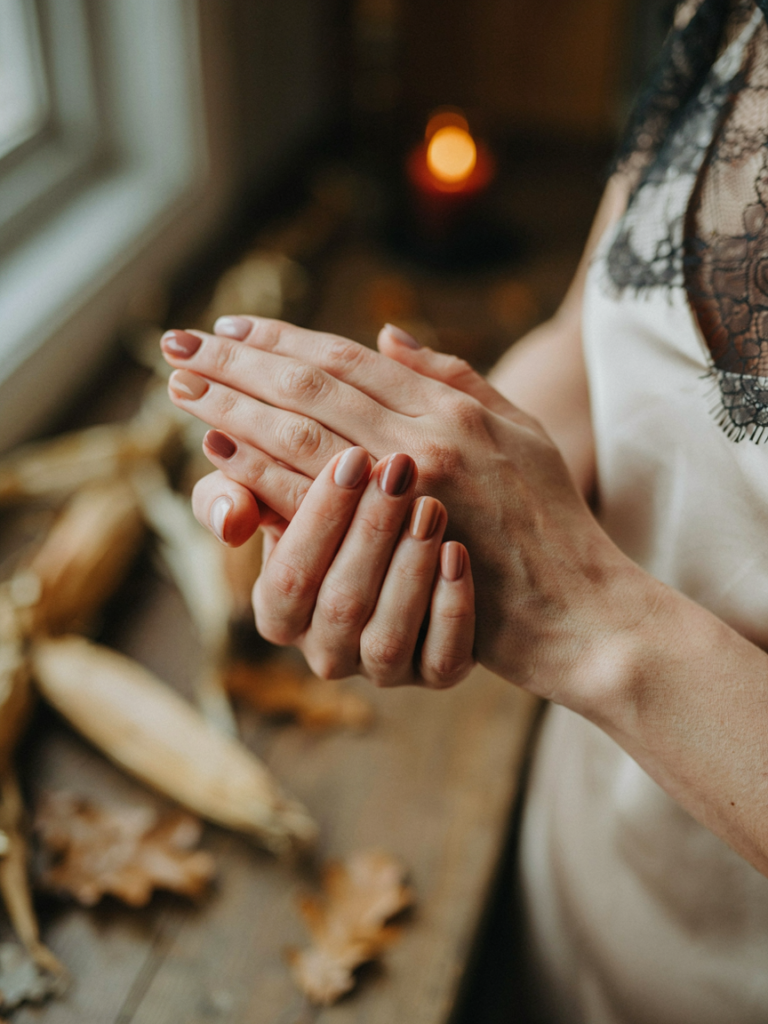
24. Muted Earth Tone Halloween Nails
Deep terracotta, burnt sienna, warm rust, and spiced brown create an autumnal palette that communicates the harvest season of Halloween without any orange-and-black color cliché. These muted, sophisticated earth tones feel fashion-forward rather than costumey, referencing the actual colors of the season — fallen leaves, dried corn, cooling soil, and wood smoke — rather than the graphic Halloween color conventions.
This palette works especially well as a monochromatic set where each nail wears a slightly different tone from the earth spectrum — from pale dusty rose through warm terracotta to deep spiced brown. The progression from light to dark across the nails creates a visual gradient when your hands are held together that is quietly beautiful and deeply seasonal. Add a matte or satin finish for maximum sophistication and wearability.
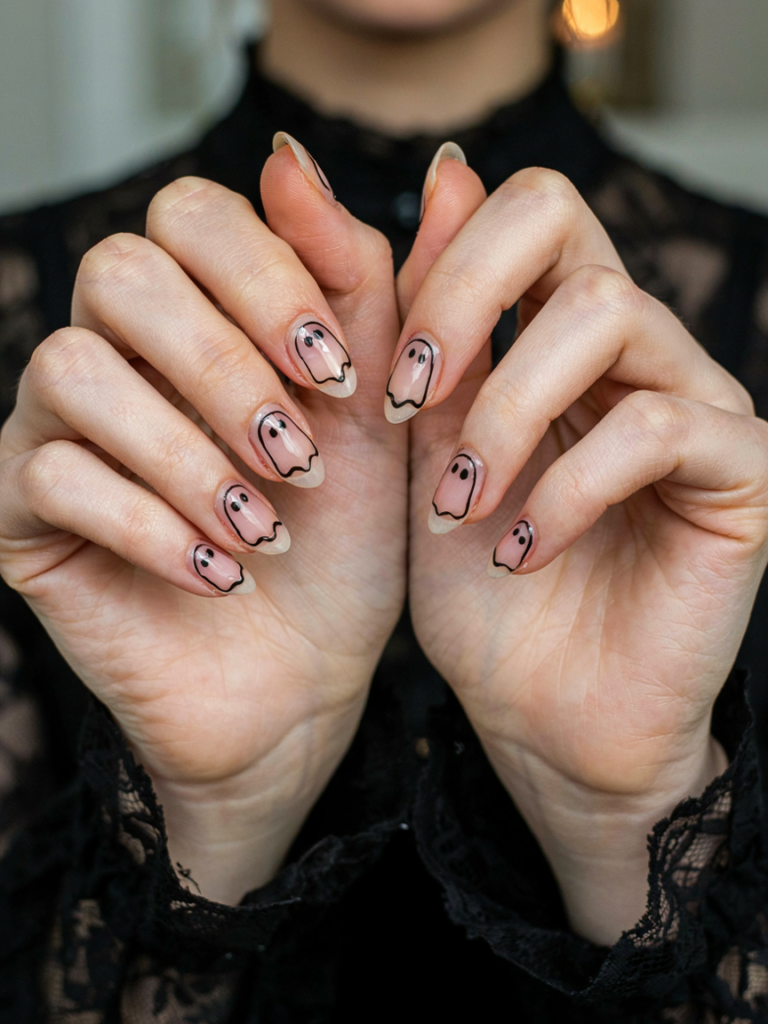
25. Ghost Outline on Clear Nails
On a completely clear or very sheer base that allows the natural nail to show through, paint just the minimal outline of a ghost shape in thin black lines — the round body, the wavy hem, the two circular eyes — so the ghost appears to float on the nail surface with no opaque background supporting it, creating a ghostly, weightless quality. The transparency of the base makes the ghost appear to exist in the nail itself rather than on top of it.
The outline must be confident and clean to work at this scale — wavering or hesitant lines lose the ghost’s soft roundness and clarity. Use a fine nail art liner with good flow and ink opacity for the sharpest possible outline against the transparent base. The finished ghost nails have a genuinely unique, ethereal quality that differs from any other approach to ghost nail art — they look like the ghost is haunting the nail itself, trapped just beneath the surface.
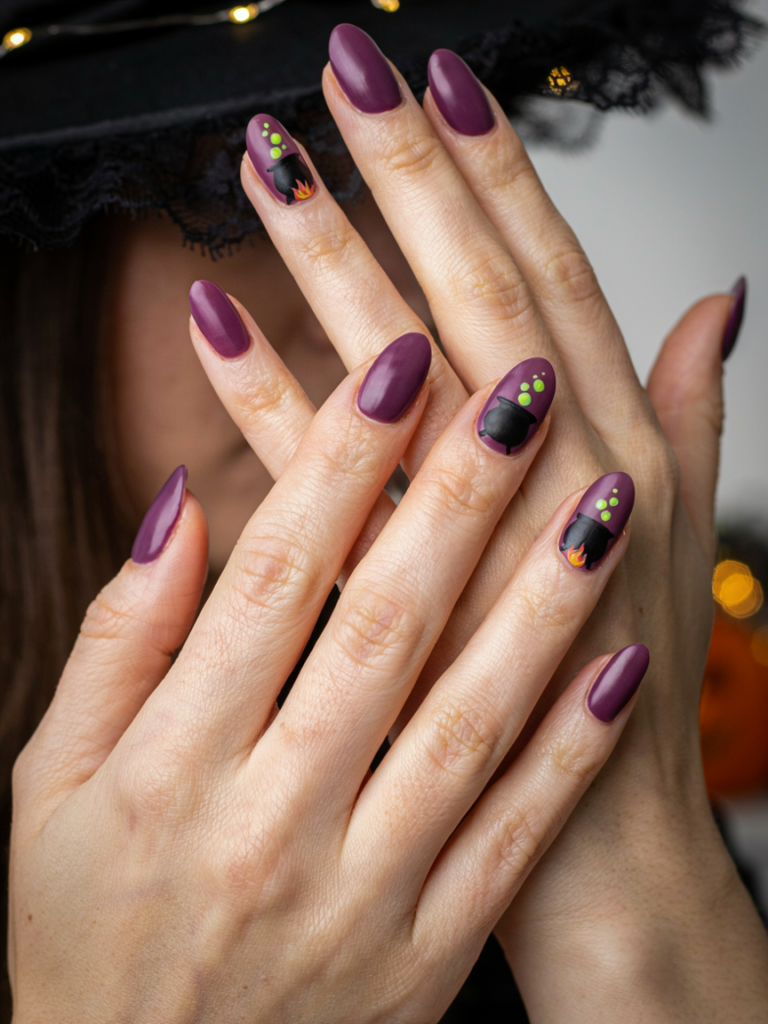
26. Tiny Cauldron Nails
A miniature, cheerfully bubbling cauldron drawn in simplified black lines on a matte black base — the rounded pot body, the three stubby legs, the bubbles rising from its rim — is a cute, recognizable, and technically accessible Halloween design that communicates the full witch-and-magic Halloween fantasy in a compact, charming image. The cauldron is ancient as a Halloween symbol and endlessly variable in its treatment, from cute to genuinely ominous.
Add small green bubble dots rising from the cauldron’s mouth to suggest the supernatural contents within, and paint a tiny flame beneath the pot in orange and yellow to complete the scene. The flame, cauldron, and bubbles together create a complete mini-scene that tells its own small story of witchcraft in progress. Pair this cauldron accent nail with clean solid matte nails in deep purple or black for a set that balances the illustrated accent against minimalist surrounding nails.